Ansible Ad-Hoc Commands

Hi there! I'm Dinesh, a passionate Cloud and DevOps enthusiast. I love to dive into the latest new technologies and sharing my journey through blog.
Ansible ad-hoc commands are quick and simple commands used to perform tasks on managed nodes without the need to write a playbook. They are useful for tasks that don't require complex logic or need to be executed on the fly.
Key Features of Ad-Hoc Commands
Immediate Execution: Ad-hoc commands let you run tasks immediately without creating a playbook file.
Direct Commands: They use Ansible's modules directly from the command line to manage your infrastructure.
Simple Syntax: They have a straightforward syntax, making them easy to use for basic tasks.
Here’s a guide to help you get started with Ansible ad-hoc commands:
Step 1: Generate SSH Key Pairs on the Master Machine
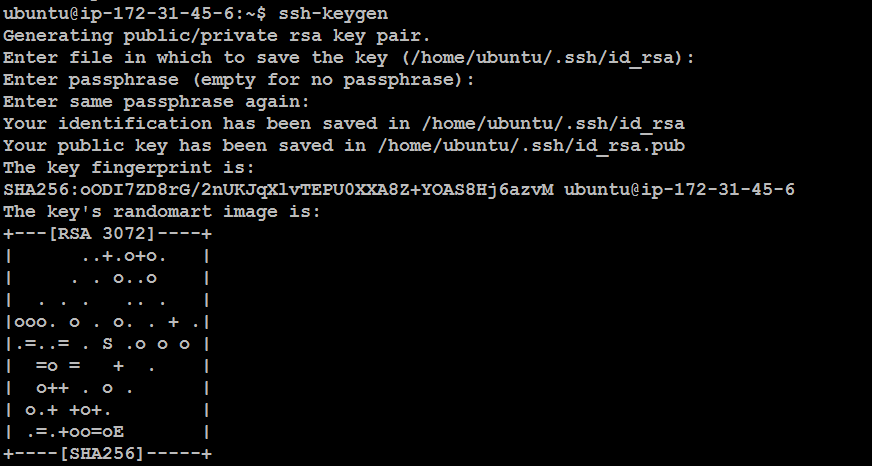
First, we need to generate SSH key pairs on the master machine, which will be used to securely connect to the slave machines.
This command will generate a pair of keys (private and public) in the default location (~/.ssh/).
ssh-keygen
Step 2: Verify the SSH Key Pair
To check the key pair, navigate to the SSH directory and list the contents.
cd ~/.ssh/
ls -lrt
The id_rsa file is the private key, and id_rsa.pub is the public key.

Step 3: Copy the Public Key to Slave Machines
Next, copy the public key to each of the slave machines. This will allow passwordless SSH connections from the master machine.
cat id_rsa.pub
You’ll need to manually copy the content of the id_rsa.pub file.

Step 4: Paste the Public Key on Slave Machines
For each slave machine, you’ll paste the public key into the ~/.ssh/authorized_keys file.
- SSH into Slave Machine 1:

- SSH into Slave Machine 2:

- SSH into Slave Machine 3:

Step 5: Create an Inventory File
Ansible requires an inventory file to manage the list of hosts. Let’s create an inventory file and add the slave machines.
touch inventory.ini

Edit the inventory.ini file to include the IP addresses and usernames of your slave machines:
username@ipaddress
username@ipaddress
username@ipaddress

Step 6: Ping All Machines Using Ansible
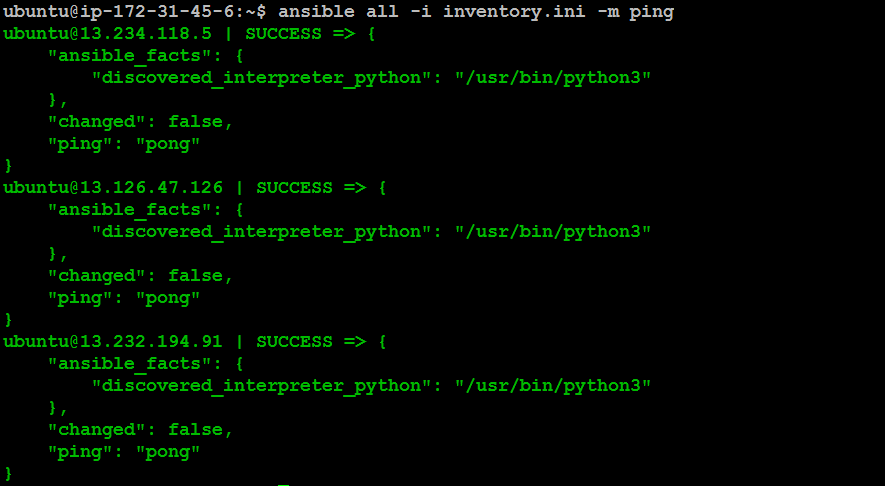
To verify connectivity to all slave machines, use the following Ansible ad hoc command:
ansible all -i inventory.ini -m ping
This command should return a pong from each machine, confirming that Ansible can communicate with them.
Step 7: Execute System Commands with Ansible
You can now run various system commands across all slave machines:
- Check System Information:
ansible all -i inventory.ini -a "uname -a"

- Check System Uptime:
ansible all -i inventory.ini -a "uptime"

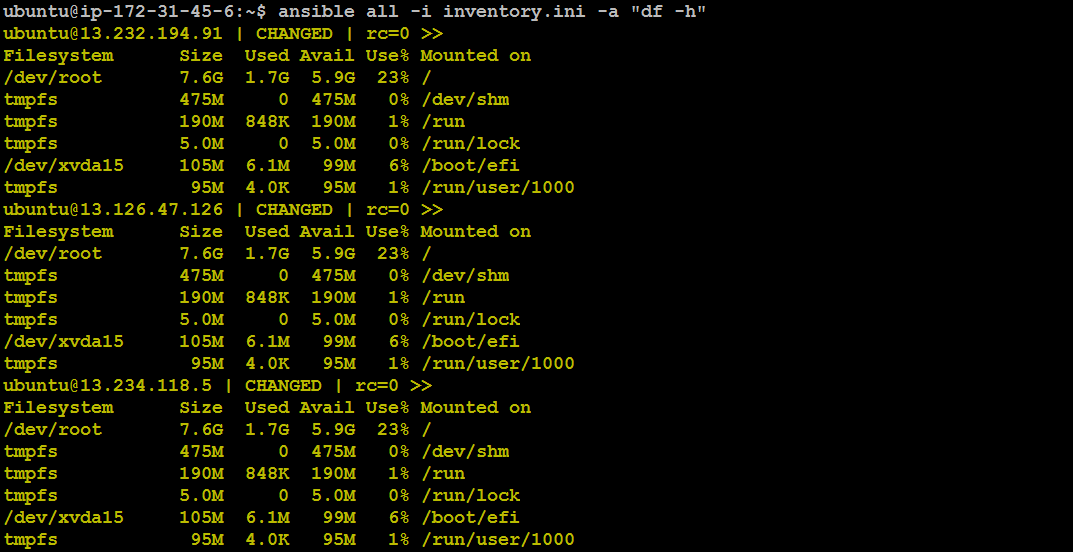
- Check Disk Usage:
ansible all -i inventory.ini -a "df -h"
Step 8: Install Apache on All Machines
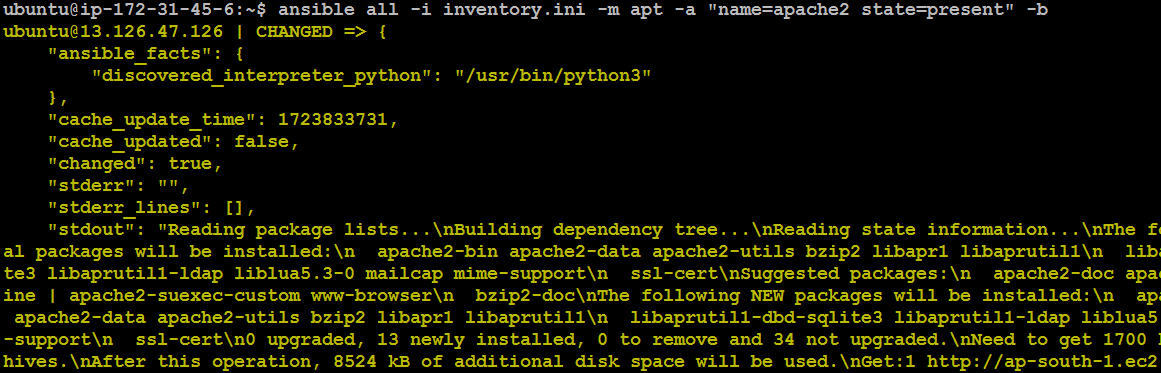
To install Apache across all slave machines, use the following command:
ansible all -i inventory.ini -m apt -a "name=apache2 state=present" -b
This command uses the apt module to install Apache and the -b flag to execute with sudo privileges.
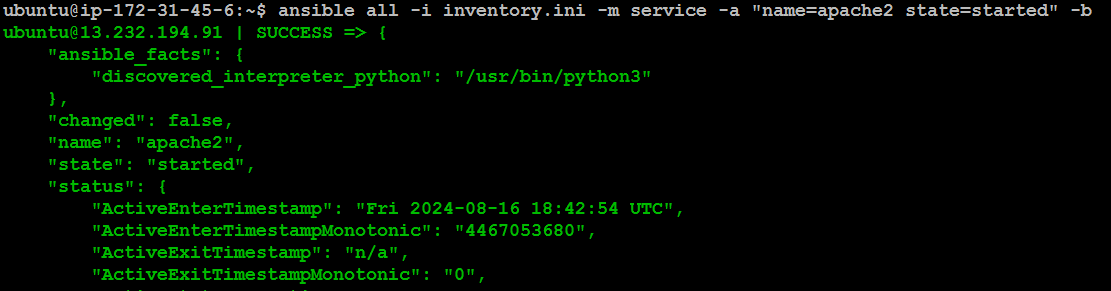
Step 9: Start the Apache Service
After installation, start the Apache service on all machines:
ansible all -i inventory.ini -m service -a "name=apache2 state=started" -b
Step 10: Verify Apache Installation
Open the IP address of each slave machine in a browser to ensure Apache is running. You should see the Apache default page.
Slave Machine - 1

Slave Machine - 2

Slave Machine - 3

Step 11: Deploy a Custom HTML File
Let’s create a simple index.html file on the master machine:
vi index.html

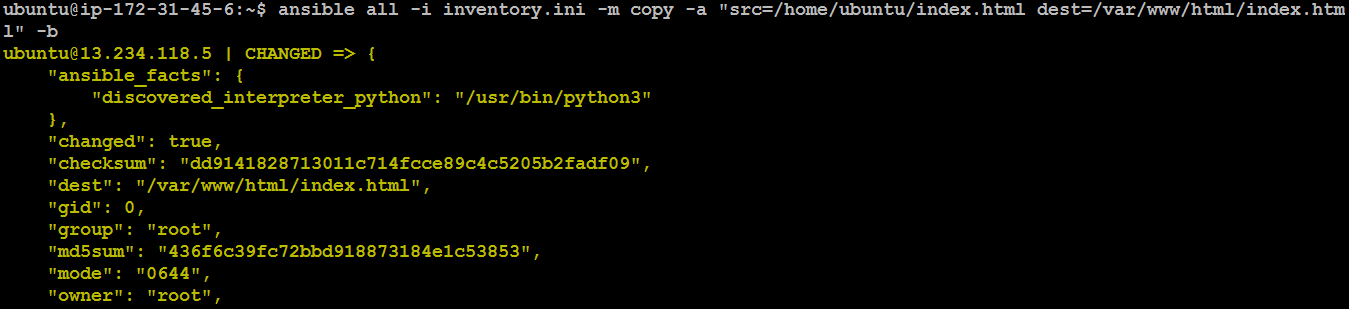
Add some content to this file, then use Ansible to copy it to the Apache root directory on all slave machines:

Then use Ansible to copy it to the Apache root directory on all slave machines:
ansible all -i inventory.ini -m copy -a "src=/home/ubuntu/index.html dest=/var/www/html/index.html" -b
Step 12: Verify the HTML Deployment
Finally, check the IP addresses of all slave machines in a browser. The custom content from index.html should be displayed.
Slave machine - 1

Slave machine - 2

Slave machine - 3
